
This was something I had made with the intention of posting it back in January as part of the Dark Days challenge. The challenge host got exceptionally busy, so the challenge died. Clearly, I wasn’t going to be keeping up with it anyway, so while I’ll miss the fun in participating, I also completely understand that life sometimes gets in the way.
But, this soup reminds me of all that I loved about the challenge. Throwing together a meal of entirely local ingredients is a true challenge, even in this part of the country. It takes planning and creativity, but it pushes you to cook things you wouldn’t ordinarily. Like this soup. Probably not something I would have made if I had my whole pantry and everything in the grocery store available to me. But, it is absolutely delicious.
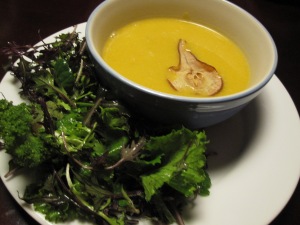
It’s relatively simply, hearty, and great for a cold winter’s day. I topped mine with crumbled bits of Marin Sun Farms pancetta and served it up with a crisp Sonoma rose. Absolutely delightful.
I took a lot of liberties with the original to work within my local parameters. It’s a simple recipe and lends itself well to tinkering.
Apple and Parsnip Soup
Inspired by the The Kitchn
3 Granny Smith apples (about 1-1/2 pounds), peeled and cored, and diced into small pieces
1-2 tablespoons olive oil
1 large yellow onion, diced
About 1-1/4 pounds medium parsnips, peeled and cut into 1/2-inch thick rounds
1-2 bay leaves
a few sprigs of thyme, tied
5-6 cups liquid (recipe recommends chicken broth, I just used water and had no problem)
1/4 cup or so of cream or half and half
Heat the oil in a large pot over medium-high heat. Add the onions and sauté until they start to brown, about 10 minutes. Add parsnips and sauté for three more minutes. Add the apple pieces and saute for a few more minutes.
Add the broth or water, the bay leaves and thyme and bring to a boil. If you are using water, not broth, add some salt in there before you bring it to a boil – probably a tablespoon or so, maybe a bit less. Reduce heat and simmer until vegetables are very tender, about 25 minutes.
Allow the soup to cool slightly. Fish out the herbs. Purée until smooth, either by working in batches in blender or using a hand blender, thinning with more broth/water by half-cupfuls as desired. Taste it – if the parsnips are really strong, you might need a dab of honey in there. Return soup to pot and bring to simmer. Remove from heat and whisk in the cream. Season to taste with salt and pepper.
The original recipe recommends serving it with some sauteed, diced apples. A commenter suggested crushed marcona almonds, which sounds lovely. But, I have to say, completely perfect with some crumbled fried pancetta on top.


